Intro
The following is a reasonably good step by step guide to installing Alientech on an MKIV Jetta. The pictures aren't the best, and as you can see my car is a mess, but I hope this can help suppliment the guide provided by the nice people at Alientech. Please email questions/concerns/etc to me at kyle@junglist.org.
Step 1
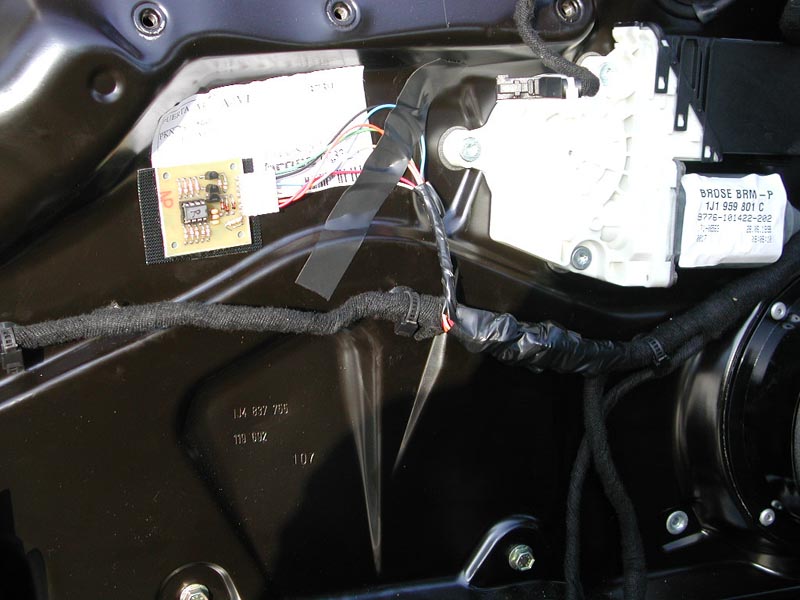
The Alientech window controller and the neat little doohickeys (UG Connectors) that tap into your alarm
harness wiring.

Step 2
The resistor indicated in this picture (colored orange-orange-yellow-gold) must be broken off (or cut
using wire cutters) in order to enable ANY window rollups. Rather than breaking this off entirely, I snipped one of the leads,
and bent it out of the way.

Step 3
Next, remove the 3 T-20 Torx screws located on the bottom edge of the drivers side door.

Step 4
Then remove the phillips head screw on the front side of the drivers door, near the top edge.

Step 5
Using a small flat head screwdriver, gently pry the bottom side of the door handle away from the arm
rest. Be careful not to mar the surface of your armrest!
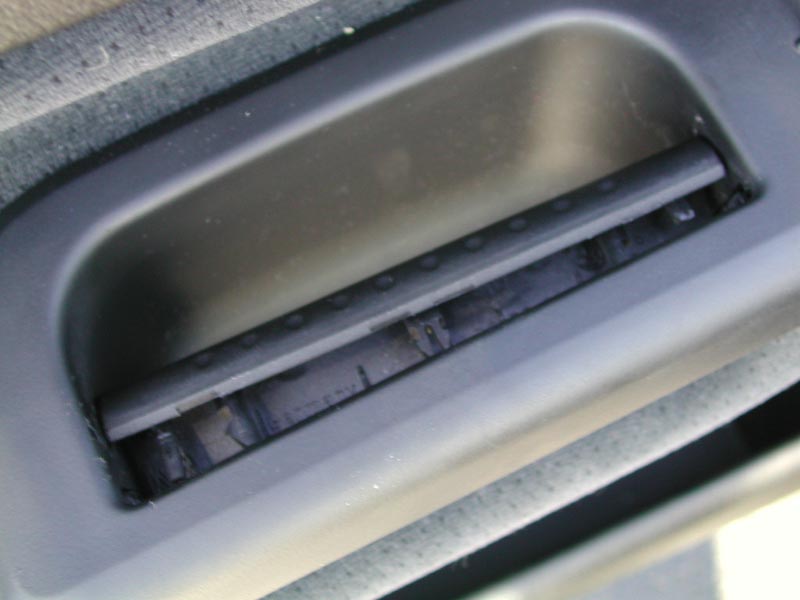
Step 6
The panel that contains the window & lock controls can then be removed with a bit of force.

Step 7
Disconnect the panel from the cable, taking note of what color it is. There is going to be a couple
more of these in side the door as well, connecting the gas lid, trunk, etc, but you won't have access to them until the door panel has been detached.

Step 8
Next, remove the 3 large phillips head screws indicated in the picture. Be careful not to drop them
down into the door, there's a slim chance you might misplace them.

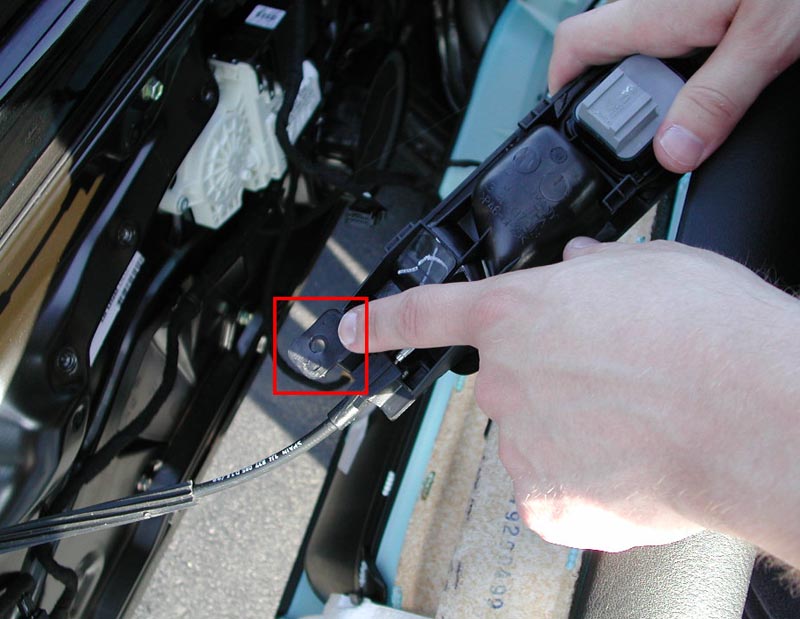
Step 9
At this point, the door is only attached to the frame by 6 plastic connectors. You should be able to gently pop the connectors loose by pulling out on the door panel. Please note that the door release handle is still attached to the car. There is a phillips head screw that is accessable from inside the door holding the release handle assembly to the door panel. Once this screw is removed, you should be able to pop out the door release handle, turn it sideways, and free the door panel competely from the door.
Step 10
After disconnecting the rest of the electrical connectors from the door, you can swing the panel out of
the way, and get on with installing the Alientech device.

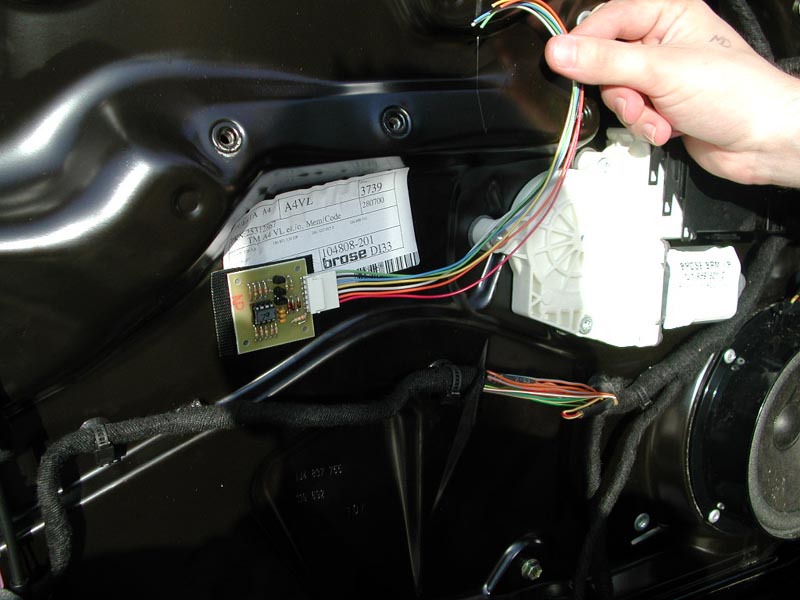
Step 11
Now you can clearly see the wiring bundle that you need to splice into.
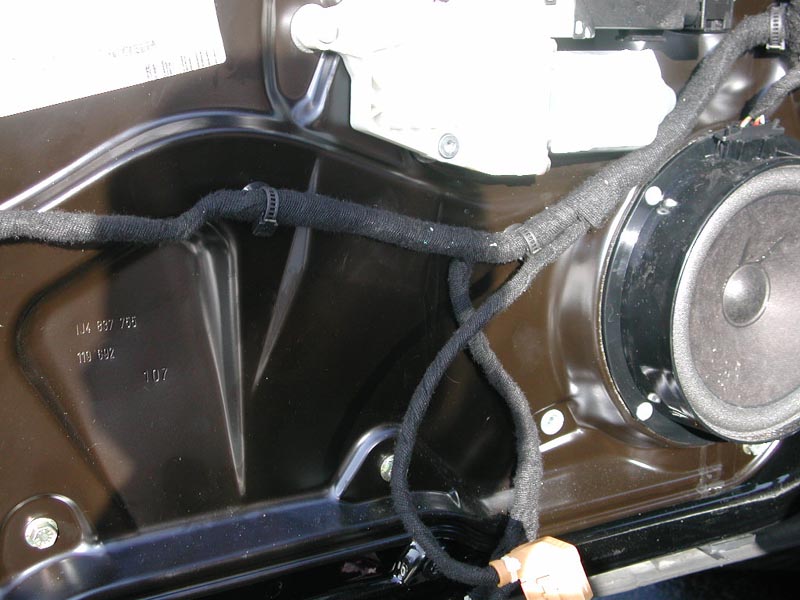
Step 12
Using a razor knife, CAREFULLY remove about 5 inches of the cloth tape from the wire bundle. As you can see, I removed the tape just after the second standoff (the plastic thing holding the cables to the door).

Step 13
Next, using the sticky backing on the Alientech controller, stick the device somewhere on the door
where it won't be in the way.
Step 14
After gently separating the wires, I placed one of the provided wiring connectors on the appropriate
wires. Refer to the Alientech install guide for the actual chart.
Note: If the connector does not move freely once placed onto the wire, it is not on far enough. Also, try to stagger them so when you tape it up later on, it won't be a big clumpy mess.
Note: If the connector does not move freely once placed onto the wire, it is not on far enough. Also, try to stagger them so when you tape it up later on, it won't be a big clumpy mess.
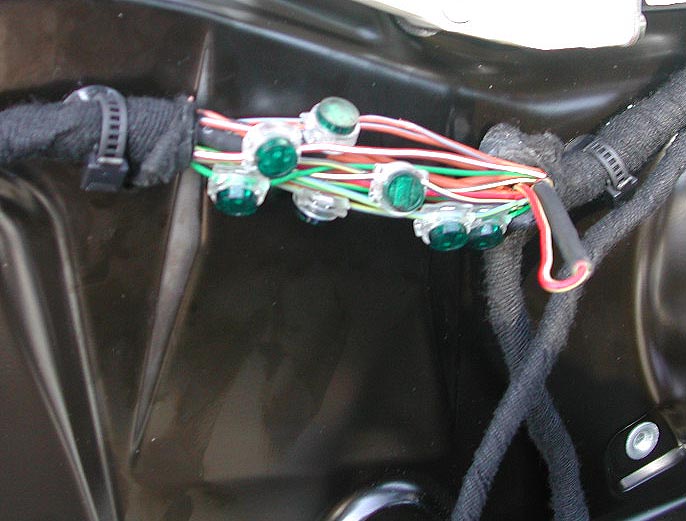
Step 15
After ensuring that all of the UG connectors were in place on the correct wires, I inserted the appropriately colored wire from the Alientech controller. You don't have to strip the ends of the wires, simply push them into the hole on the UG connector until you can see that they are fully inserted.

Step 16
Once I had double checked to make sure I had all the proper colors matched up, I crimped the UG
connectors onto the wire using a pair of pliers. I've found that this is easiest with a tool such as a leatherman, rather than
a smaller pair of needlenose-like pliers.

Step 17
Once I was done crimping, I placed the door panel inside my car, shut the drivers side door, and tested to make sure everything was okay before I went about taping up the wires and reattaching the door panel. After I was sure everything was working, I taped up the wires, reattached my door and Voila! I had an Alienteched car!
Note: Try disabling the 30-second timeout when configuring your Alientech in order to roll up your windows without having to open and close your driver side door.
Note: Try disabling the 30-second timeout when configuring your Alientech in order to roll up your windows without having to open and close your driver side door.